Showing posts with label 03 Sereina. Show all posts

Thursday, May 16, 2013

Paleo No-Bake Carrot Cake

Written by Sereina April 19, 2013


I only remember having carrot cake a few time in my life, but for the past year I've been wanting to make one. It had been a long time and I still hadn't made it, so now that I'm dairy-free and not eating sugar I decided to look for a Paleo recipe. I found this on on Google and it is so good! It wasn't till I made it that I realized it was a no-bake recipe. There's no flour and it's sweetened with dates. And the frosting on it? It's made with cashews, yet it tastes so good.

Paleo No-Bake Carrot Cake
via Betty Rawker

Ingredients:

1 cup grated carrot
1 cup raw walnuts
1 cup (about 9) medjool dates, pitted
1 cup shredded coconut
1 teaspoon vanilla extract
1/2 teaspoon Chinese Five Spice seasoning
1/3 cup walnuts, chopped (optional)

Frosting:
1 cup raw cashews
2 tablespoons maple syrup or honey
2 tablespoons coconut oil
2 teaspoons vanilla
1 tablespoon water
pinch of salt

Directions:
1. Put the carrots in a Vitamix for food processor and mix until shredded. Scoop into a large bowl.

2. Puree 1 cup walnuts in the 
Vitamix for food processor  Add in mejool dates and then blend into a paste. Add to the bowl with the grated carrots.

3. Add the shredded coconut and stir/mash until combined.  Then add the vanilla, five spice, and walnuts, if using them. Mix until well incorporated.

4. Shape the carrot cake with your hands onto a plate. Chill in the fridge for a minimum of 1 hour.

5. Blend all of the frosting ingredients together in the Vitamix for food processor until smooth and combined. Add more water if needed. Chill in the fridge until the cake is done, then frost the cake.

Thursday, May 9, 2013

Sereina Bakes Paleo Snickerdoodles


Written By Sereina April 17:


These cookies don't taste exactly like regular sinckerdoodles, but they're still really good! With the texture, we decided that they're like donut holes. They're really easy to make and the hardest part is letting them chill in the fridge for an hour. The nutmeg almost makes them taste like eggnog, so they'll be really good for the Christmas season too. Recipe found here.

Ingredients:
  • 1 1/2 cups of almond meal
  • 1 tbs of coconut flour
  • 1 egg
  • 1/4 cup of honey
  • 1/4 cup of melted coconut oil
  • 1 tsp of vanilla
  • 1/2 tsp of cinnamon + extra for rolling dough in
  • 1/2 tsp of nutmeg
  • 1/2 tsp of baking soda
  • 1/4 tsp of sea salt

Directions:
  1. Combine all the ingredients together in a bowl and mix well.
  2. Cover the cookie dough and place in the fridge to chill for one hour.
  3. Preheat oven to 350 degrees.
  4. Roll the cookies into small balls and coat in cinnamon.
  5. Use the bottom of a cup or jar to flatten them out.
  6. Place cookies on a parchment lined cookie sheet and bake for 10 minutes.

Thursday, May 2, 2013

Inside the Capital Building


Written by Sereina February 9, 2013

Yesterday, for the first time in my life, I went inside the capital building in Olympia. I've lived in Washington my whole life and it only took me nearly 19 years to visit it. :P

 
There are several really big and fancy chandeliers. 


Hangin' out in the main area.


All the doors inside had George Washington door knobs. Pretty cool.

Some more chandeliers.

Thursday, April 25, 2013

Knotted Bow Headbands


Written by Sereina Feb. 7, 2013

Last week I got to visit with Sarah at her house. We made chicken dumpling soup and did some crafting while watching an episode of Downton Abbey. We made these super cute knotted bow headbands that I found on Pinterest. They turned out really cute and I'd like to make a few more, because they're easy to make, comfortable to wear, and I really like the style of them. We both made a second headband, just a bit wider, but don't have any photos of them.

Friday, February 8, 2013

Sereina's Projects

Something I originally wanted to share when I started this blog was my children's projects.  Initially I thought I would talk all about them or have them talk all about them.  They enjoy blogging about the projects on their  own personal blogs which seemed like a lot of duplicity and life has been busy so, as you can see, I haven't posted much in a long time.  This morning the Lord inspired me to post monthly about each child's activities, just highlighting various projects.  That feels so much freedom to me  to do that since it's still on my heart to feature my children's projects.

Sereina made this gift to give a friend for her birthday.  
She made the salts and decorated the jars.

Sereina was inspired by another blogger to do her first painting.  She chose Paradise Falls from the movie, "Up."  She doesn't consider herself very artistic, but I really think she is.  She had to redo the background  since she felt it turned out too dark the first time, which was a blessing to see as I remember a time when not getting it right the first time would have been really hard for her to accept.  I am really glad for the teaching in Lifestyle of Learning about how to develop character along with their learning activities so they have a truly well rounded education.


The above and below pictures are some of her photography artwork which is her main passion and her new vocation, she started her photography business, Sereina Charise Photography,  in the beginning of January.  The above picture colloage is Koko, one of our Seal Point Siamese cats.  He's quite the character as you might note from the picture.

This picture collage is from our state capitol building.

Sereina and a friend got together to craft and they each made a couple of knotted bow headbands.  this is one of Sereinas.  They found the idea on Pinterest.  I think they look very cute.

These are some of Sereina's projects from the last month or so.

Thursday, July 19, 2012

Jam: Beginners Edition


At the end of June, we went strawberry picking for the first time in quite a few years. Even though it was cloudy, it was fairly warm out and soon we were ready to leave, after we had picked 35lbs of berries!

Jam had been something that I thought would be neat to make, but always seemed a bit intimidating, because of all the boiling of the cans and lids, keeping them sterile, etc.. Another thing I didn't like was all the sugar that was used in the recipes. I always try to make my food low to no sugar or use something like honey or maple syrup instead. So after finding a recipe online with just four ingredients, plus it used honey instead of sugar, I decided to can some jam for the first time.

 Since I'd never made jam or done any kind of canning before, I didn't have any of the usual canning supplies (canning jar rack, canning funnel, jar lifter) other than 7 Kerr Mason Jars that my mom had.


---

The first thing to do was wash all of the jars and lids. After they've been cleaned, they were placed in a large pot. Since I didn't have a canning rack, which goes in the bottom of the pot to keep the jars from touching the bottom of the pot, I used a few old kitchen towels. I used one on the bottom and two or three around the edges and between the jars. The pot was then filled with water and boiled.

The jar lids (the flat parts, not the rings) went in a small pot of simmering water to sterilize. 


While the jars simmered, I made the jam, following the recipe. The strawberries are mashed to the desired chunky-ness, then the pectin was added.  There were several different types of pectin at the store, and the recipe didn't require a certian type, so I went with Classic Pectin.

Next the honey and lemon juice was added, then the jam was boiled.

Using two pairs of metal tongs, I removed the jars from the boiling water, filled them with the jam while leaving a little space at the top, and placed on the lid, using tongs to keep them sterile.

Once all the jars were filled, they were placed back into the water and boiled for ten minutes.

Then they were removed from the pot and set on the counter to cool. While they are cooling, the lids will pop once the lids are completely sealed.

And there you have it! Homemade jam, without sugar, and no special tools that you don't already have in your kitchen.


By Sereina

Sunday, January 22, 2012

Twirly Circle Skirts


Written by Sereina:


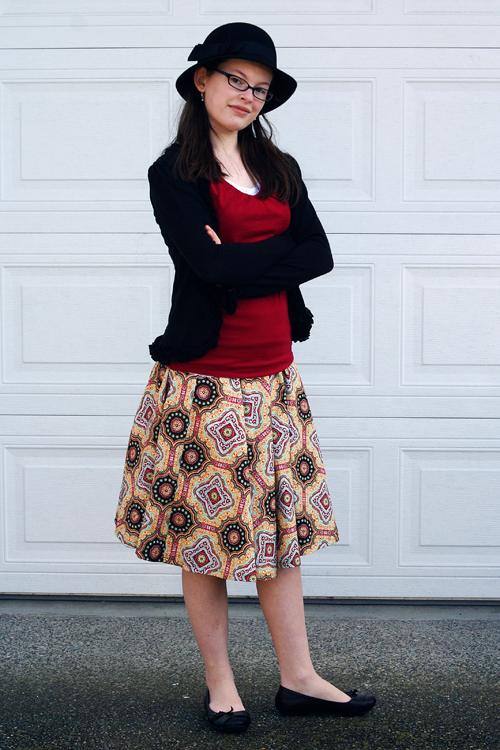
This month I finally made a second circle skirt using some fabric I had bought months ago (you can read about my first skirt below). I had picked up this pretty green floral fabric at Jo-Ann's way back in September. Four months later, and I finally made it.


Since I already had a pattern made from last time, I didn't have to spend my time making it and got to start by cutting pieces out instead.


On my first one, I rushed through the process, since I wanted to get it done and wear it so bad. Because of that, my hem turned out pretty bad looking, so with this one I took my time folding and pinning the hem, making it look nice and neat even before I sewed it.

Here's a picture of the hem on the first skirt. It's pretty bad looking.

And then here is the hem on my second skirt. Much better!


My First Colorful, Super Pretty, Amazingly Twirly Circle Skirt
Written by Sereina on March 19, 2011


This week, I sewed a circle skirt. My very first circle skirt. I was super happy when I found a tutorial for a circle skirt with an elastic waist instead of a zipper, and knew I wanted to make one. Also, we had just gotten the latest Jo-Ann Fabrics add in the mail, which included a 50% off coupon. So my mom took me to Jo-Ann's and I picked up a couple yards of a wonderful and colorful fabric. I made the mistake of not creating the pattern before going fabric shopping, so when I was ready to cut out my pieces, I didn't have enough fabric. I was glad there was another 50% off coupon so I could buy enough fabric for the other half of the skirt, since the fabric was normally $9.99 a yard.


Other than not having enough fabric, the skirt was really simple to make. The hardest part was doing the hem. Some parts of it didn't turn out too well and there was an quite a lot of fabric to hem.


I love how it twirls!


Monday, December 12, 2011

Felt Ornaments


Written By Sereina

Last year I came across a book called Fa la la la Felt just after Christmas, so I've been waiting till this Christmas season to check it out from the library. It's an awesome book filled with simple felt crafts. There are three sections: ornaments, decor, and stockings. So far I've made two ornaments, a bird and a bell and today I started on a candy garland. 

I made both of the ornaments with materials I already had. The felt was left over from other projects and I got the buttons from Tiana (she has tons of them). 

You may recognize the wing fabric as the material I used for my circle skirt.

Friday, December 9, 2011

Christmas Wreath


By Sereina

While I was blog reading, I came across a project using the inside of an embroidery hoop as a base for making a wreath using live greenery (I found it here. Those snow globes would be fun to make as well!) I liked the idea of using the embroidery hoop, since their cheap and easy to find, and then suddenly inspiration struck: I could use strips of fabric and tie them onto the hoop to make a wreath. We have a bit of Christmas fabrics that had been sitting in a bin and never got used for many, many years, so I though it would be perfect for a Christmas wreath. It's also a great project to use fabric scraps with as well.

Luckily we have lots of embroidery hoops in sock at our house right now, so I grabbed a 9" hoop and that Christmas fabric that I mentioned earlier.

It was so simple to make, since all I had to do was cut the fabric into strips (I didn't measure mine, but I'm guessing they were around 7"x1.5") and tie them to the hoop. I alternated my colors, using one red, then a green. Mine took about 112 strips.

The finished wreath. It's now hanging on the outside of my bedroom door.


Wednesday, April 6, 2011

The Hikers Fortune by Zopingo Productions

This is a film project the kids worked on and finished last week.  First is the movie trailer...


Here is the movie...


And now the bloopers and unused clips....


Tuesday, March 22, 2011

Sereina's Embroidery

When Sereina was younger we did a little embroidery with some homeschool friends, but it didn't stick at that time.  Recently Seriena opted to order a book from the library and teach herself some stitches.  This is what she ended up doing to her pillow case.  I thought that was pretty neat.

 Not long after that she found this pattern online and made both the owl and raccoon from felt.  She hand stitched pieces together once she embroidered them.

I thought they turned out very cute.

Friday, December 24, 2010

Snowflakes

At the Lifestyle of Learning Project Fair the Polings did a snowflake presentation/workshop for the kids.  Philip and Rachel gave some wonderful pointers and then let the kids have a hand at it.  The kids really enjoyed that and we came home and made several more.  I thought it was great to see Daniel take an interest in spending several hours cutting snow flakes and I gave it a go as well.

 Sereina's

 Daniel's

 Daniel's

 Sereina's

 Daniel's

 Sereina's

 Tiana's

Tiana's
Related Posts Plugin for WordPress, Blogger...